Sentinet 5 review
Nevatech has just launched the latest version of its API Management and API Governance software platform, Sentinet 5.
Sentinet 5 comes with some new features, but the major change is the new User Interface for its management console, the previous versions relied on Silverlight, and had a bit of an antiquated look & feel, nevertheless, it was an extremely powerful API Management platform with a wide array of API management and governance features.
Sentinet 5 release notes stated that any modern browser is supported, and recommends using Chrome for better user experience and performance. I tested the management console interface using Internet Explorer 11.953.14393.0 and Chrome 67.0.3396.99. In my first experience, I didn’t notice much difference in performance between the two browsers, expect for minor UI variances.
The new User Interface is light-weight, and the user experience really intuitive when working with the Sentinet artifacts, using features like right-click, and drag & drop.
I won’t go through the details of installation and configuration of Sentinet in this post, as it is well-documented in Sentinet installation and user guides. Instead, I will show an example that leverages some of its powerful features with the out-of-the-box components, enough to give you a glimpse on how much more you can accomplish using the platform.
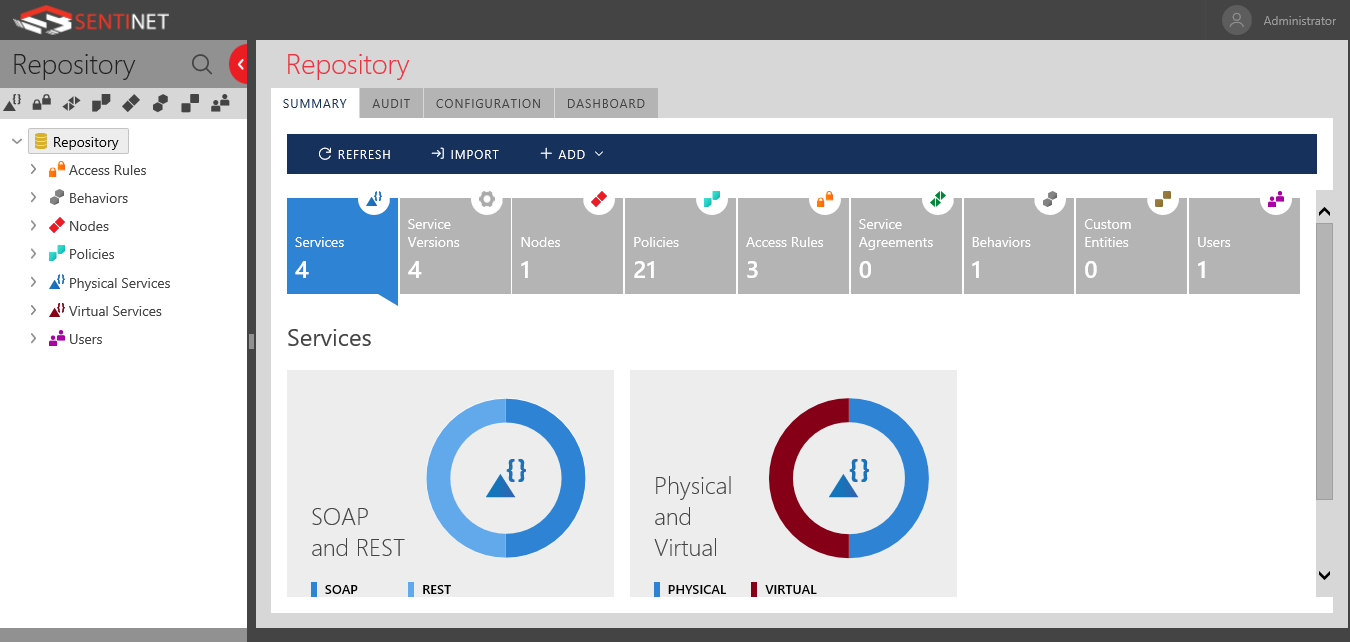
Sentinet Basics
Basically, Sentinet creates virtual service, that acts as a facade over an actual physical service, or multiple physical services. A Sentinet node is an IIS virtual application, a logical container, that hosts your virtual services. You can have more than one Sentinet node, each of which could be deployed on the same or different machines, for a highly scalable solution.
Afterwards, you have total control over that virtual service in terms of access control policies, communication protocol, security mechanism, caching, message format, service mocking, monitoring, and auditing, just to name a few. All of which could be entirely different than those of the underlying physical service.
In the below example, I will show how you can quickly and easily create a virtual service with a different communication protocol, message format, and security scheme on top of an existing unsecured SOAP physical service, using only configurations within Sentinet.
Physical Service Registration
First, you start by registering your physical service in Sentinet, for SOAP services, you can use an existing WSDL, and for REST services you can use a Swagger. You can also manually define a service and its operations, in case a service description is not available.
In the below example, I am registering an existing physical SOAP/HTTP service WSDL.
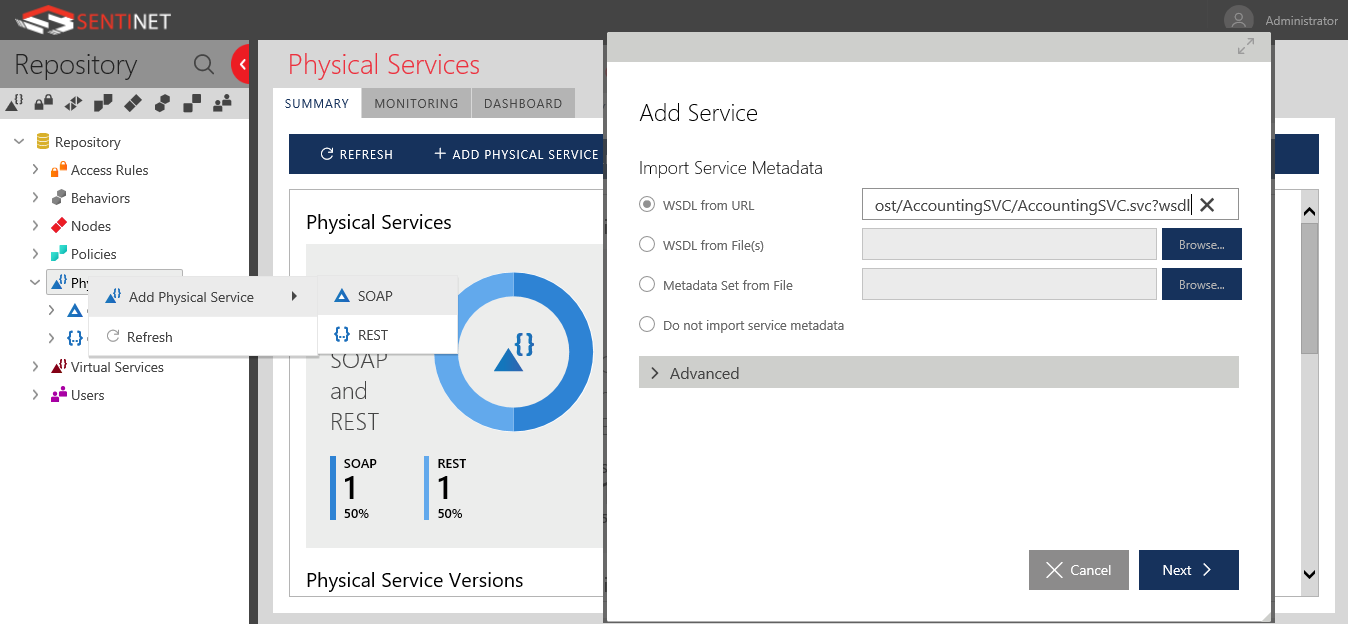
The service is a simple dummy service that I created that just returns a random customer credit number each time it is invoked.

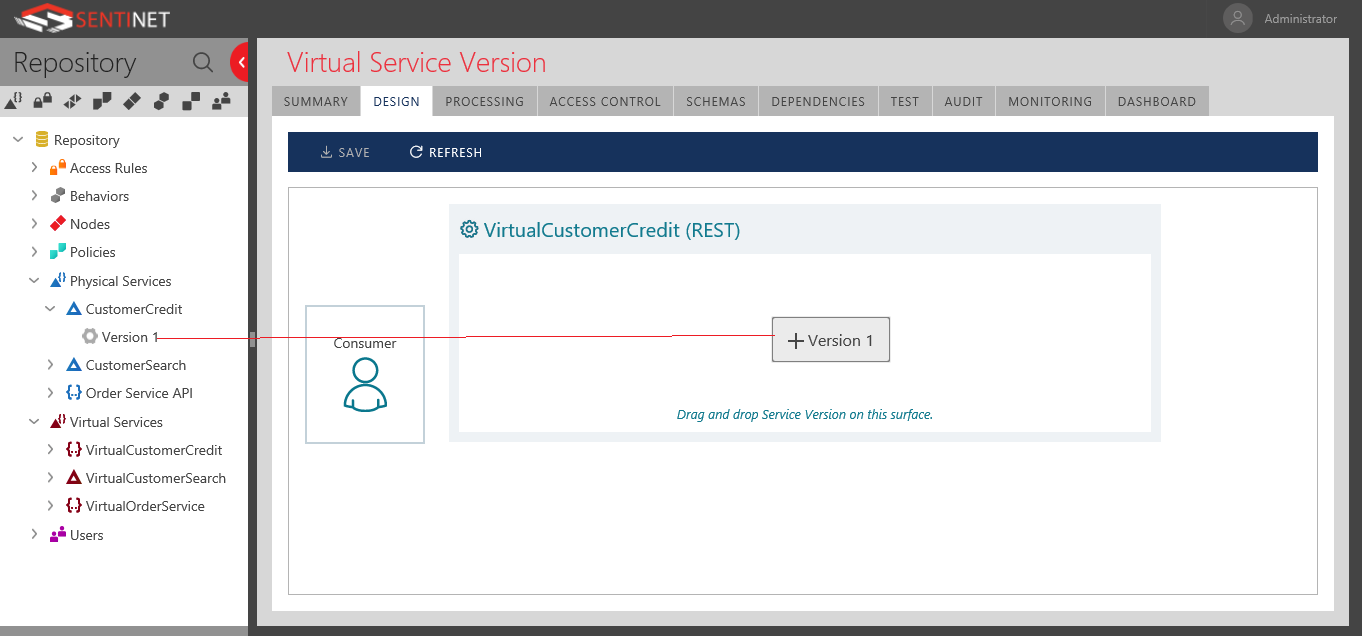
Designing the Virtual Service
In the Virtual Services node, right-click, and add the corresponding virtual service, notice it can be REST, or SOAP, for the purpose of this example, I am creating a Restful virtual API. In the Design Tab of this newly created virtual REST service, you can drag & drop the physical service version which will be virtualized.
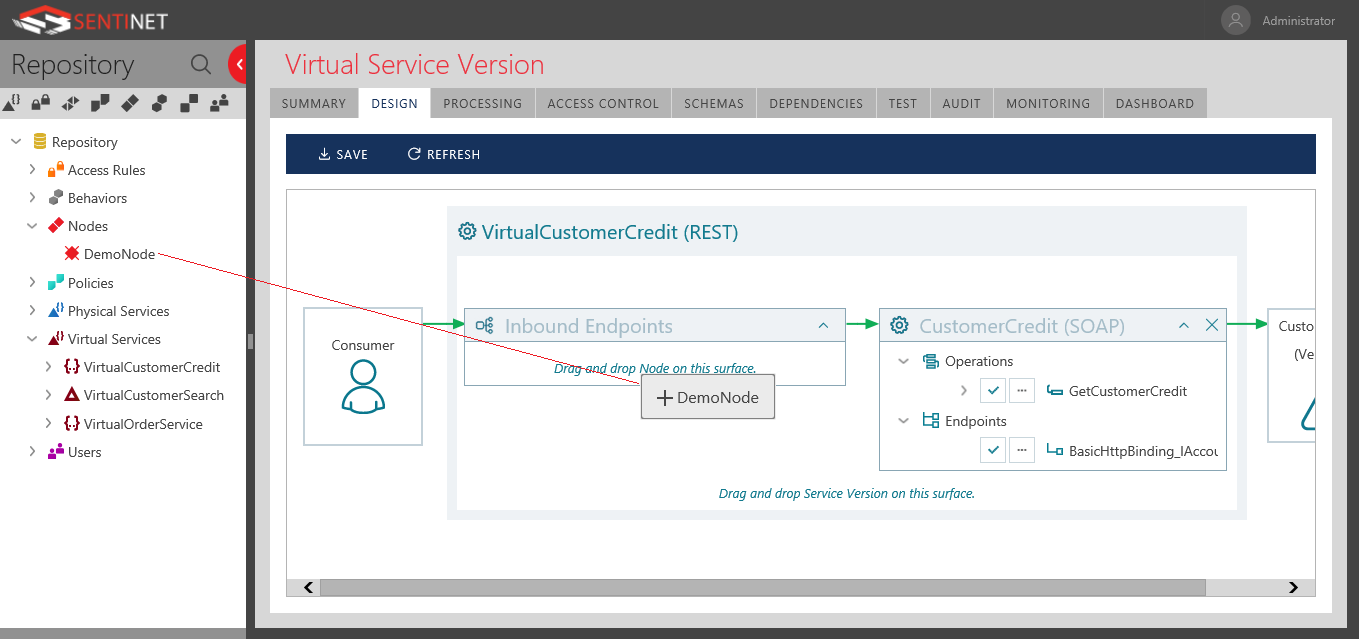
Next, you need to choose an existing Sentinet node, Please refer to Sentinet user guide on how to register and configure a Sentient node.
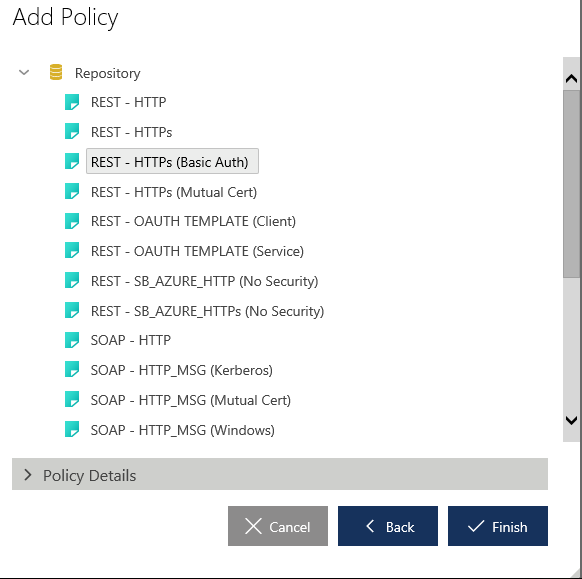
Virtual Service endpoint communication protocol
For this particular virtual service endpoint, I will set the communication protocol and security policy. I selected below REST over HTTPs, with Basic Authentication scheme.
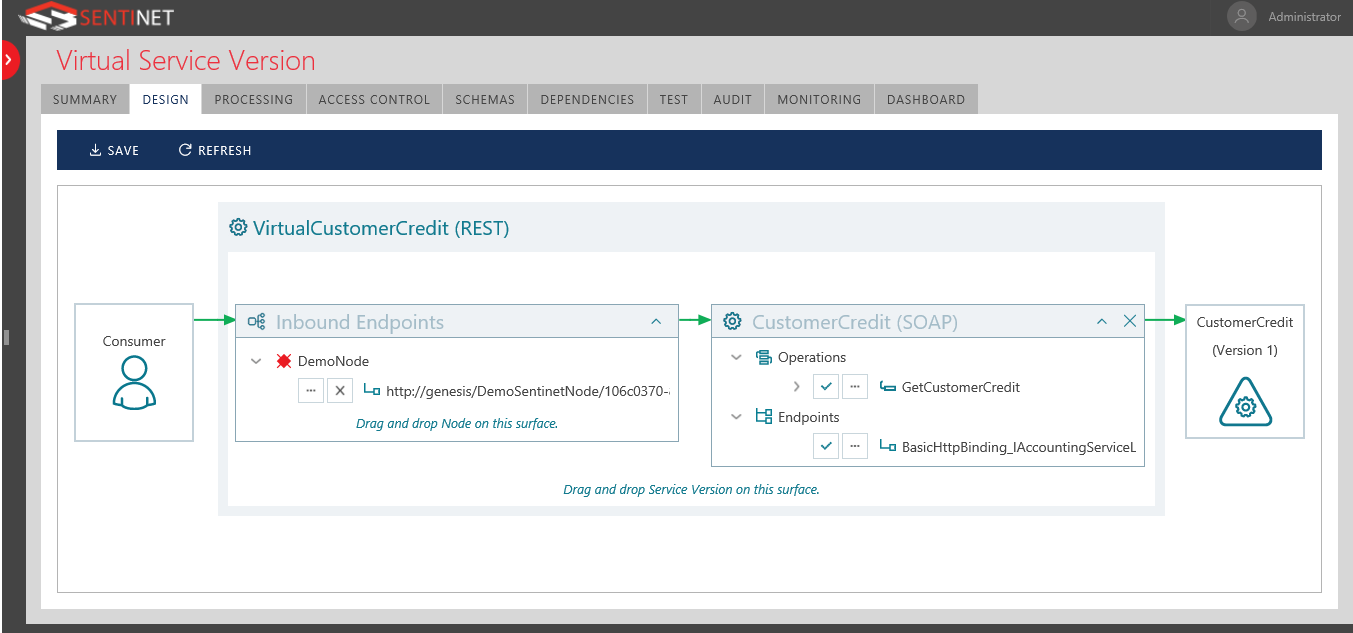
Virtual Service Design Overview
The virtual service Design Tab below now depicts the overall flow from the service consumer to the physical service. It is worth noting that you can choose which operations from the physical service you want to expose in your virtual service, and which of these you wish to hide, in case those are irrelevant to your service consumers, for instance.
Virtual Service Access Control
By default the newly created virtual service has no defined access rules, so no one will be able to consume it, so you need to define an access rule.
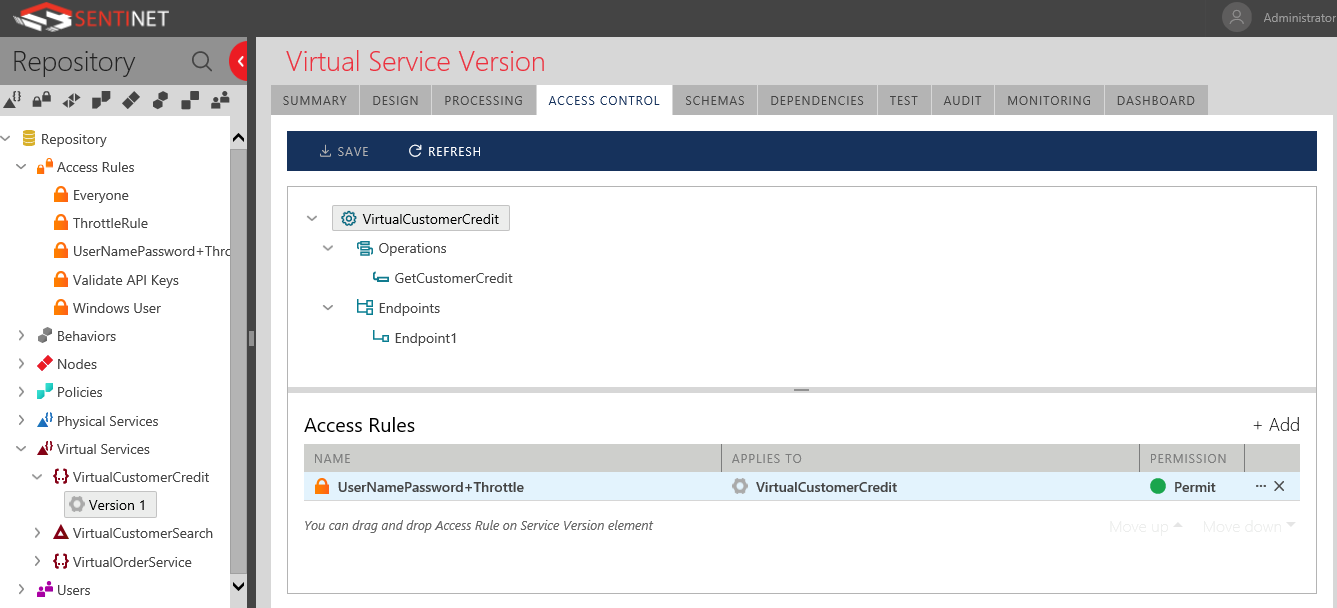
Here, I defined an access rule to authenticate against the incoming requests against a pre-defined static username (SVCuser) and password. Furthermore, I added to this access rule another expression that also throttles the incoming authenticated requests, I set it to a maximum throughput of (2) requests per minute, I was feeling generous!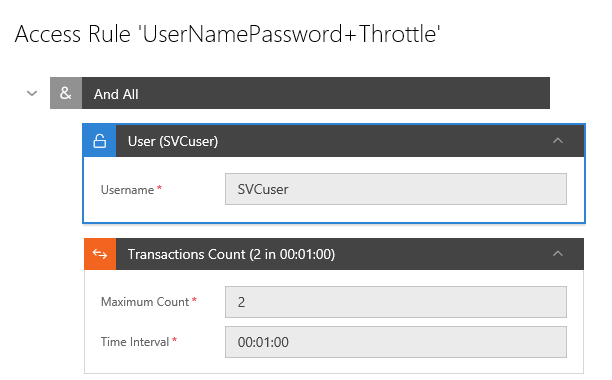 I then applied the access rule to the virtual service, note that access rules could be re-used in any other virtual services you have, if needed.
Virtual Service Message Format transformation
One final step regarding the message format, I will make the REST virtual service accept & return JSON payloads, as my physical SOAP service handles XML payloads.
This can be easily done using Sentinet processing pipelines, in the Processing Tab. The upper JSON Transformation component is configured to transform the incoming Request message from JSON to XML, and the lower component is configured to transform the Response message from XML to JSON.

Testing
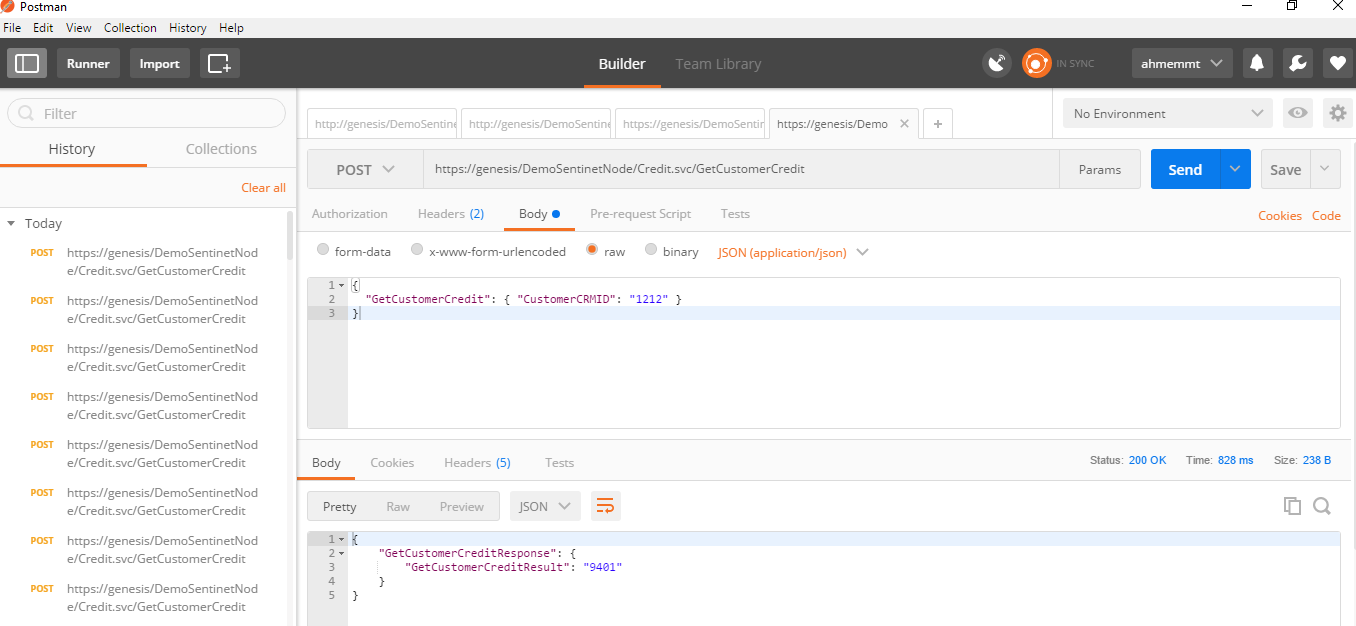
I used Postman to test the positive scenario with the correct basic authentication credentials, and a JSON request, I indeed got back the corresponding response from the physical SOAP service in JSON format.
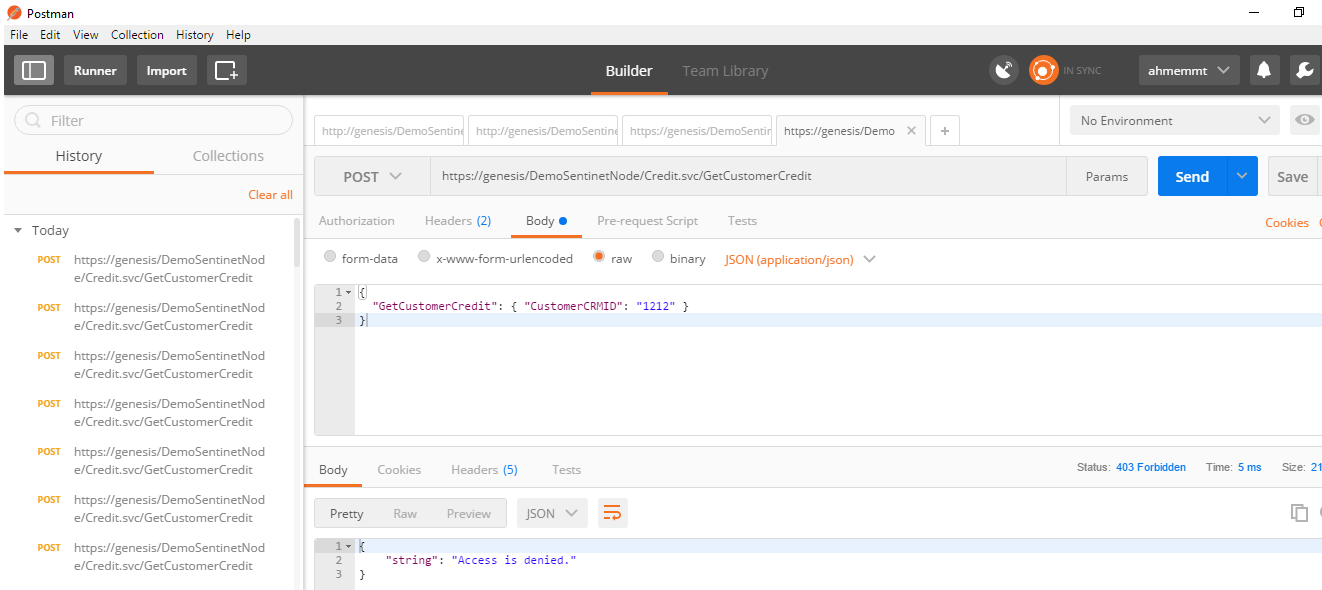
Now, when I try sending more than (2) consecutive requests within (1) minute interval, or pass the wrong credentials for the basic authentication I get an access denied (403 forbidden), as part of the defined access rules. If I entirely omit the authorization header, I get the (401 unauthorized) status code.
Monitoring
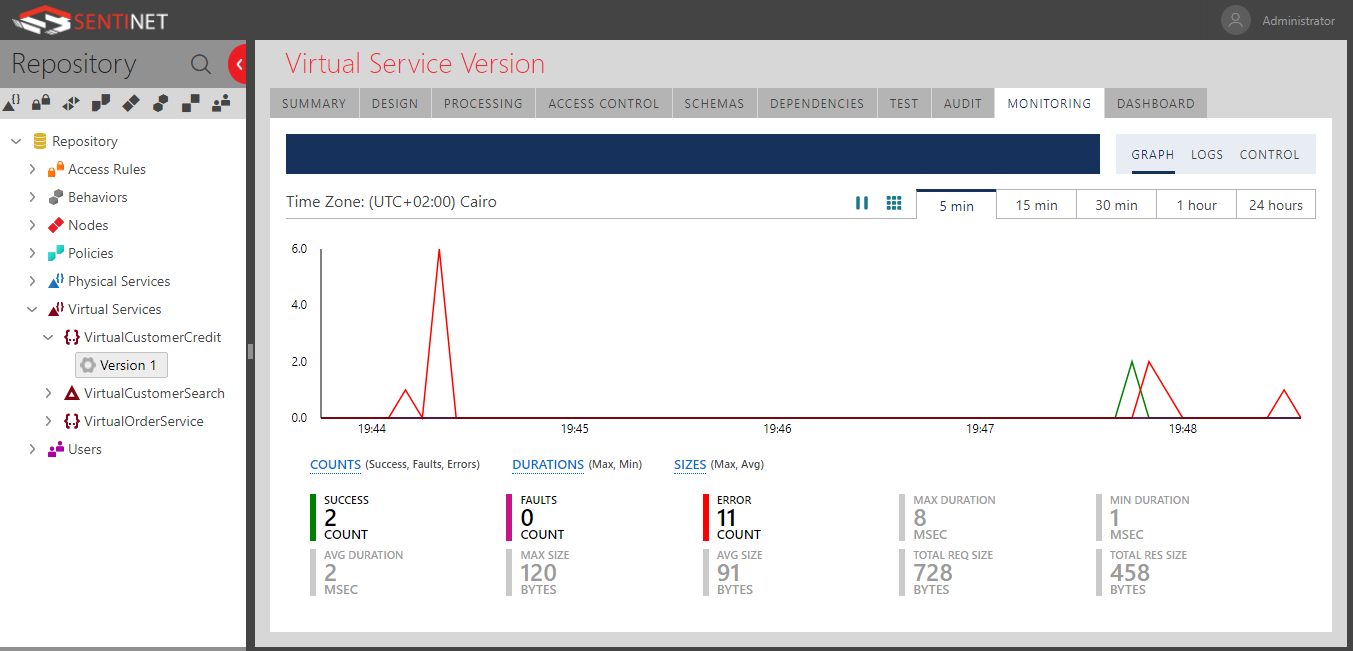
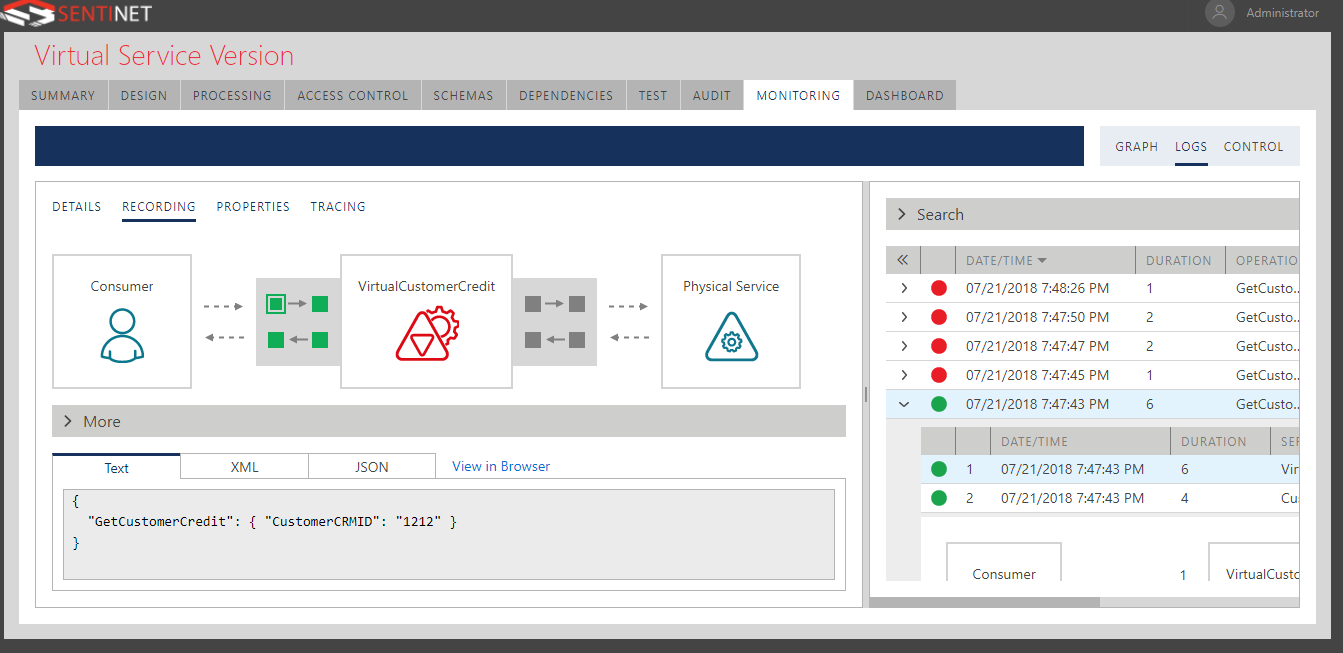
Sentinet provides a robust, real-time monitoring capability for all the transactions that went through its virtual service, notice below, it tracked my (2) successful requests and the other (11) failed requests due to my enforced throttling & user credential access rule.
It is important to note that these failed requests didn’t even make it through to the physical service, it was in a way shielded by the virtual service. Bask in the glory of API management!
You also have control over the granularity level of tracked “recorded” payload and details of your transactions going through your virtual from both ends.
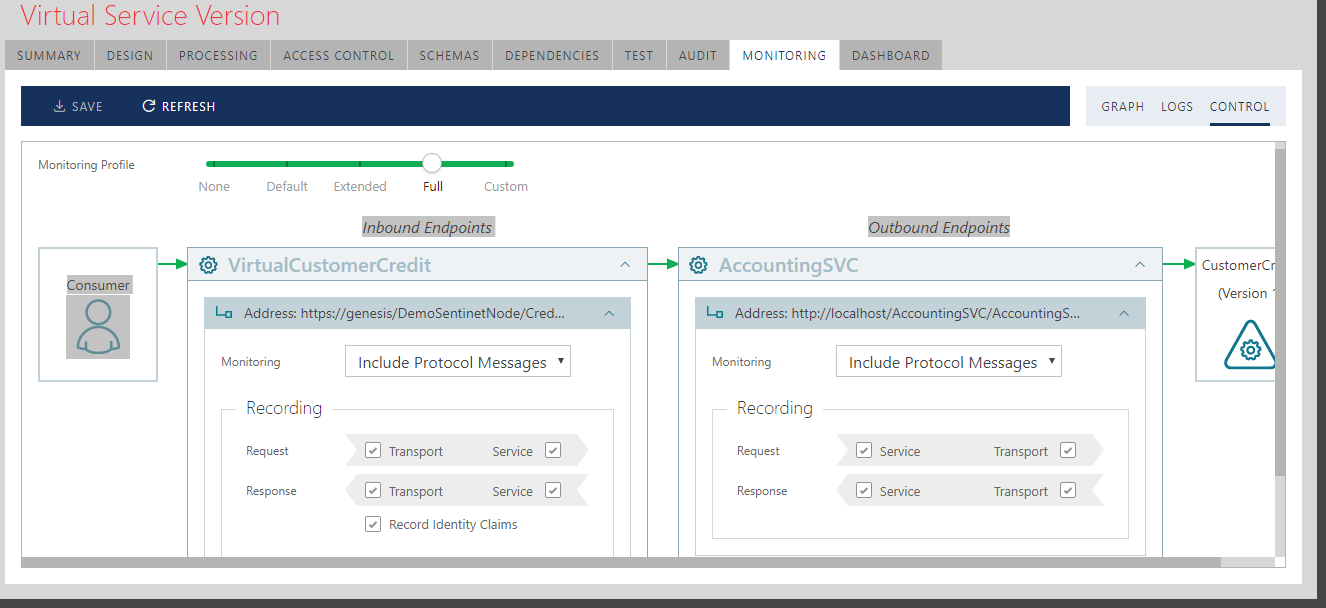
In the monitoring logs, you can inspect the payload and transaction details at each stage, by clicking on the corresponding stage, as shown below.
Final Thoughts
I have to say I was blown away with the User Interface revamp in Sentinet 5, it makes the product really shine with a new, modernized look, talking about judging a book by its cover, now the book’s cover is on par with its impressive content.
In this post, I demonstrated how to use Sentinet to quickly & easily create a REST/HTTPs virtual service that uses JSON message format, and secured it using basic authentication scheme, on top of a SOAP/HTTP physical service with no security scheme.
This post is barely scratching the surface of Sentinet capabilities, it is a very powerful on-premises API management platform, that abstracts away all the needed plumbing for the integration nuances with disparate systems, check my previous post on API management. Most importantly, it does all that for you effortlessly using configuration-based approaches, in addition to some extension points for further customization, if needed.
You can download the trial version from Nevatech site.